Following my experience in signing commits with GPG, Git and YubiKey, I continued my experiments with cryptography and decided to set up a digital signature on my personal email. That is not something I need for work, and mostly I did it just for fun.
Disclaimer. To be honest, I don’t see too much value in digitally signing/encrypting your emails for a generic audience nowadays as there are others, more convenient ways to pass information confidentially and securely, e.g., using Signal. However, for specialized cases like digitally signing legal documents or having confidential official communication, it is still applicable in many countries that recognize the validity of digital signature by law.
The input requirements were quite simple: to store an S/MIME certificate on my YubiKey and be able to sign my emails in Outlook.
Why use S/MIME specifically and not PGP for my purpose? To my mind, the major drawback of PGP is its complexity for an average user. To verify/decrypt a PGP-signed email, you have to find and install an appropriate PGP extension for your email client, find and download a public key of a sender, and actually verify by any means that the public key is trustworthy. At the same time, S/MIME is based on X.509 certificates that are supported in most email software and rely on a certification authority to validate the certificate. From a usability point of view, that makes it relatively easier for a receiving party to validate an S/MIME-signed email. So, my choice was based rather on ease of use than on security concerns.
So, let’s begin our journey.
Obtaining an S/MIME certificate
For test purposes, you can turn to free S/MIME certificate issuers, but for production usage, I would suggest provisioning a certificate from widely accepted and trustworthy certification authorities. The difference, except pricing, is usually in the widespread of certificate support from a specific CA in different OS, browsers and email clients, and additional options like identity/organization validation. However, be mindful of the latter as those additional perks are worth the same as EV SSLs.
In my case, I found a proper balance between technical certificate support and its price with Sectigo (former Comodo) S/MIME certificates. Although the issuing process is somewhat cumbersome, it is fully automated, and the customer support is really great.
After my certificate is issued and collected, I exported it from the browser to create a backup copy in ‘pfx’ format protected with a strong password: I will need that copy later to transfer the certificate to YubiKey. As I had collected my S/MIME certificate on Windows using Internet Explorer, at that moment the Windows certificate store contained the certificate along with its private key:

Storing the certificate on YubiKey
To work with YubiKey, you will need YubiKey Manager and the smart card minidriver installed on your machine. As I already wrote in my previous post, to work with X.509 certificates, you should use the YubiKey PIV applet. Also, if you haven’t configured your token, I strongly encourage you to do it first and set up the security PINs.
Word of caution. Before importing your S/MIME certificate onto YubiKey, ensure that you have its backup copy that also contains the private key. During the import process, the operating system will mark the certificate in the Windows certificate store as the one that has its secret key on the smart card. After the import, in the MMC console, the certificate will still be displayed as containing the secret key, but you won’t be able to export it with the secret part as the secret keys are non-exportable from a security token like YubiKey by design.
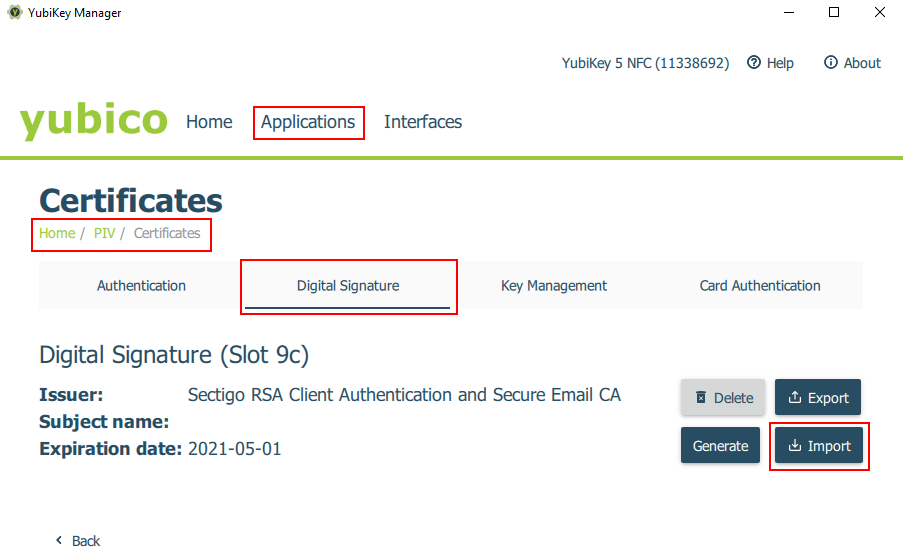
To ‘upload’ your S/MIME certificate to YubiKey, you can use either the YubiKey Manager graphical application or the command line. That process is even simpler than with PGP keys.
I specified the backup copy of my certificate in ‘pfx’ format created previously as a certificate source, and for the target import slot used ‘Slot 9c: Digital Signature.’ The import result was the following:
Configuring and signing email in the Outlook desktop app
Now, when my S/MIME certificate was successfully issued and imported into YubiKey, it was time to let the Outlook client know about it. To use the certificate in the Outlook desktop app, it should be configured in the Trust Center:
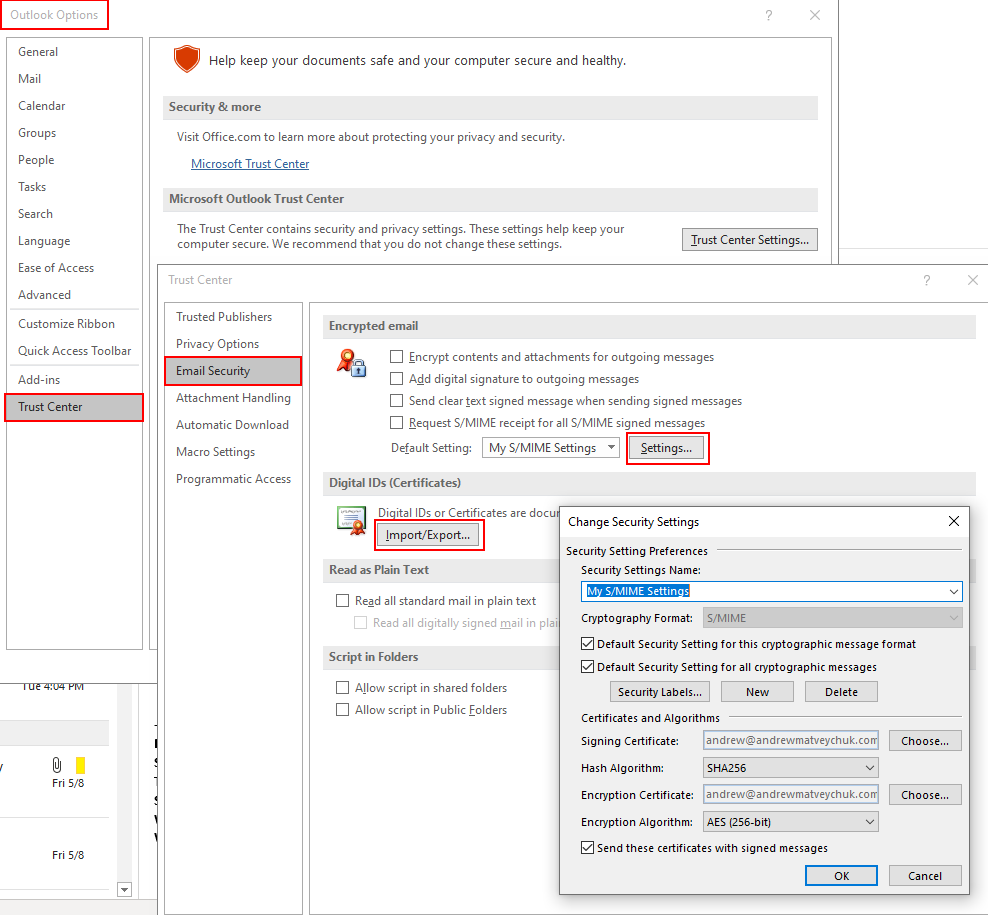
The configuration is pretty straightforward, and you can specify whether all outgoing emails should be signed by default or manually choose to sing each email individually:
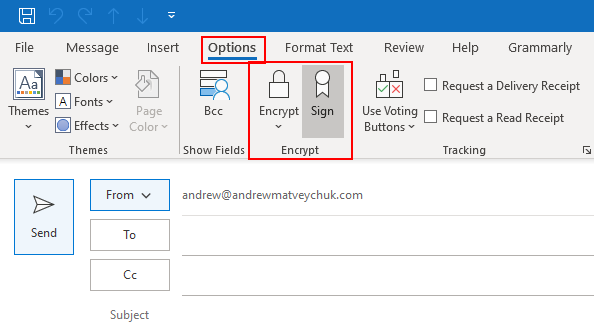
Upon sending a signed email, you will be prompted to insert your YubiKey if it‘s not connected to your computer and enter your PIN.
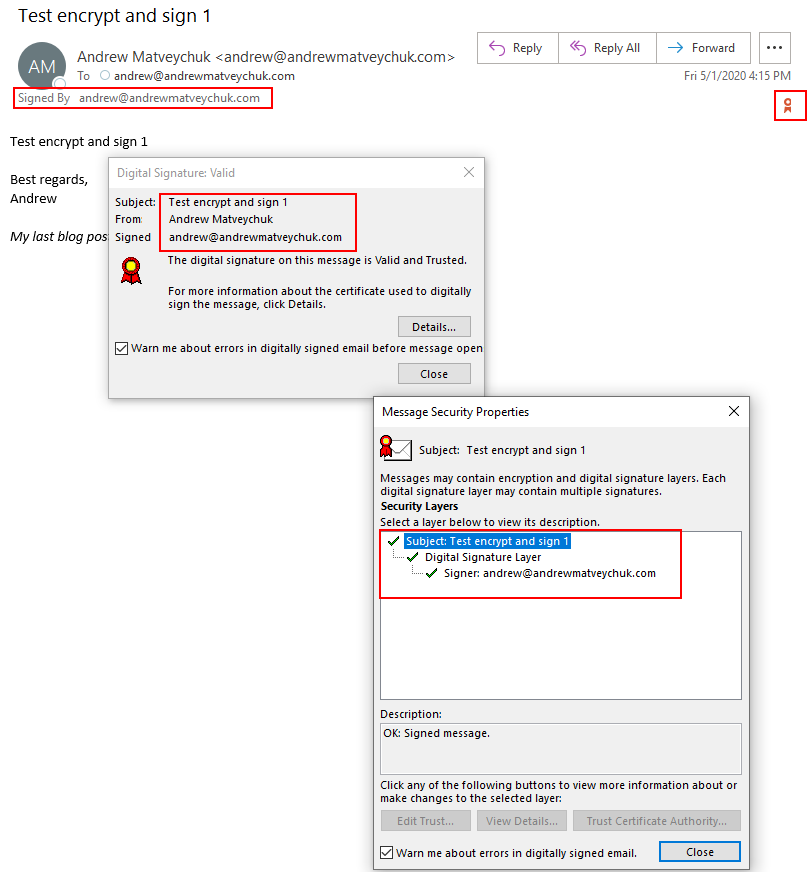
The signed email will be marked by the seal mark in the UI. If you click on it, you will be presented with the options to see the signature and certificate details:
Facing the issue with S/MIME support at Outlook.com
Up to that point, everything worked fine, and I was able to sign, send and read the signed emails in the desktop application. However, when I tried to configure the email signing in the web version of Outlook, I was a little bit disappointed.
Firstly, according to the documentation, ‘S/MIME might not be available for your account,’ but there is no clue why it might be unavailable. After some investigation and chatting with people on forums, I figured out that S/MIME functionality is currently supported only for work/school accounts, i.e., business Microsoft/Office 365 subscriptions. If you are using a Microsoft account for your email even with Outlook Premium or Microsoft Personal/Home subscription, then you are not eligible for S/MIME functionality in the web version of Outlook – “just business, nothing personal…”
Secondly, if you are using Chrome or the new Chromium-based Microsoft Edge, you cannot install the Microsoft S/MIME extension on a non-domain-joined computer. As a result, you even cannot ‘validate’ the signed emails sent to you. Sounds somewhat discriminating in that context, don’t you think so?
S/MIME and Outlook iOS app
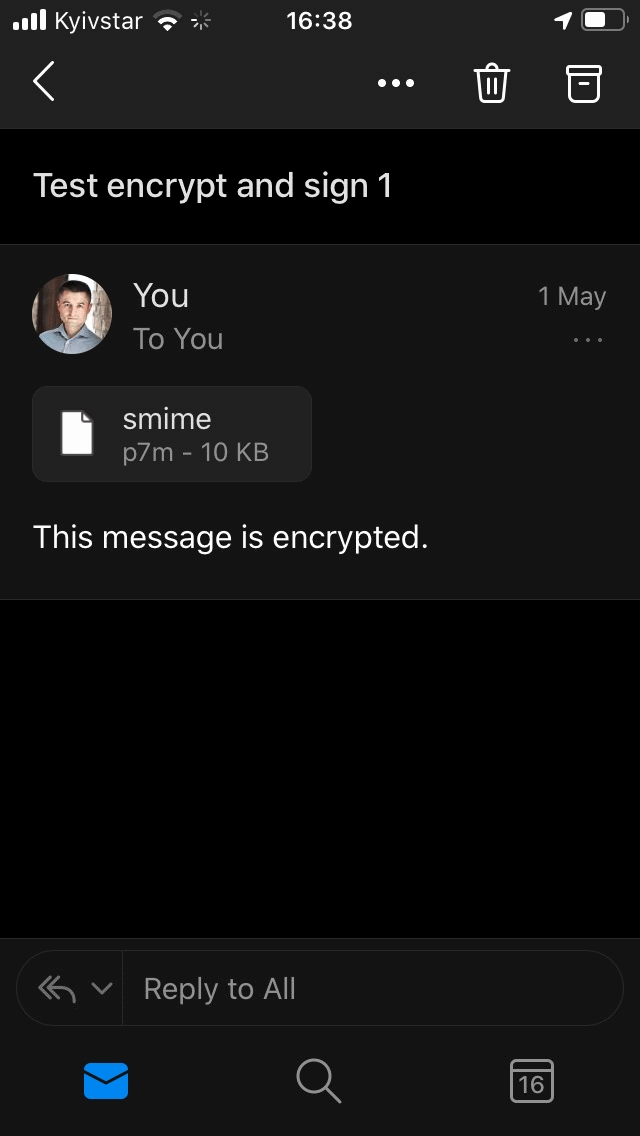
The same bitter experience expected me with the Outlook mobile app. I have both Outlook.com and Office 365 accounts configured in it, and S/MIME support is available only in the settings for Office 365 accounts. In an Outlook.com mailbox, signed emails are just unreadable:
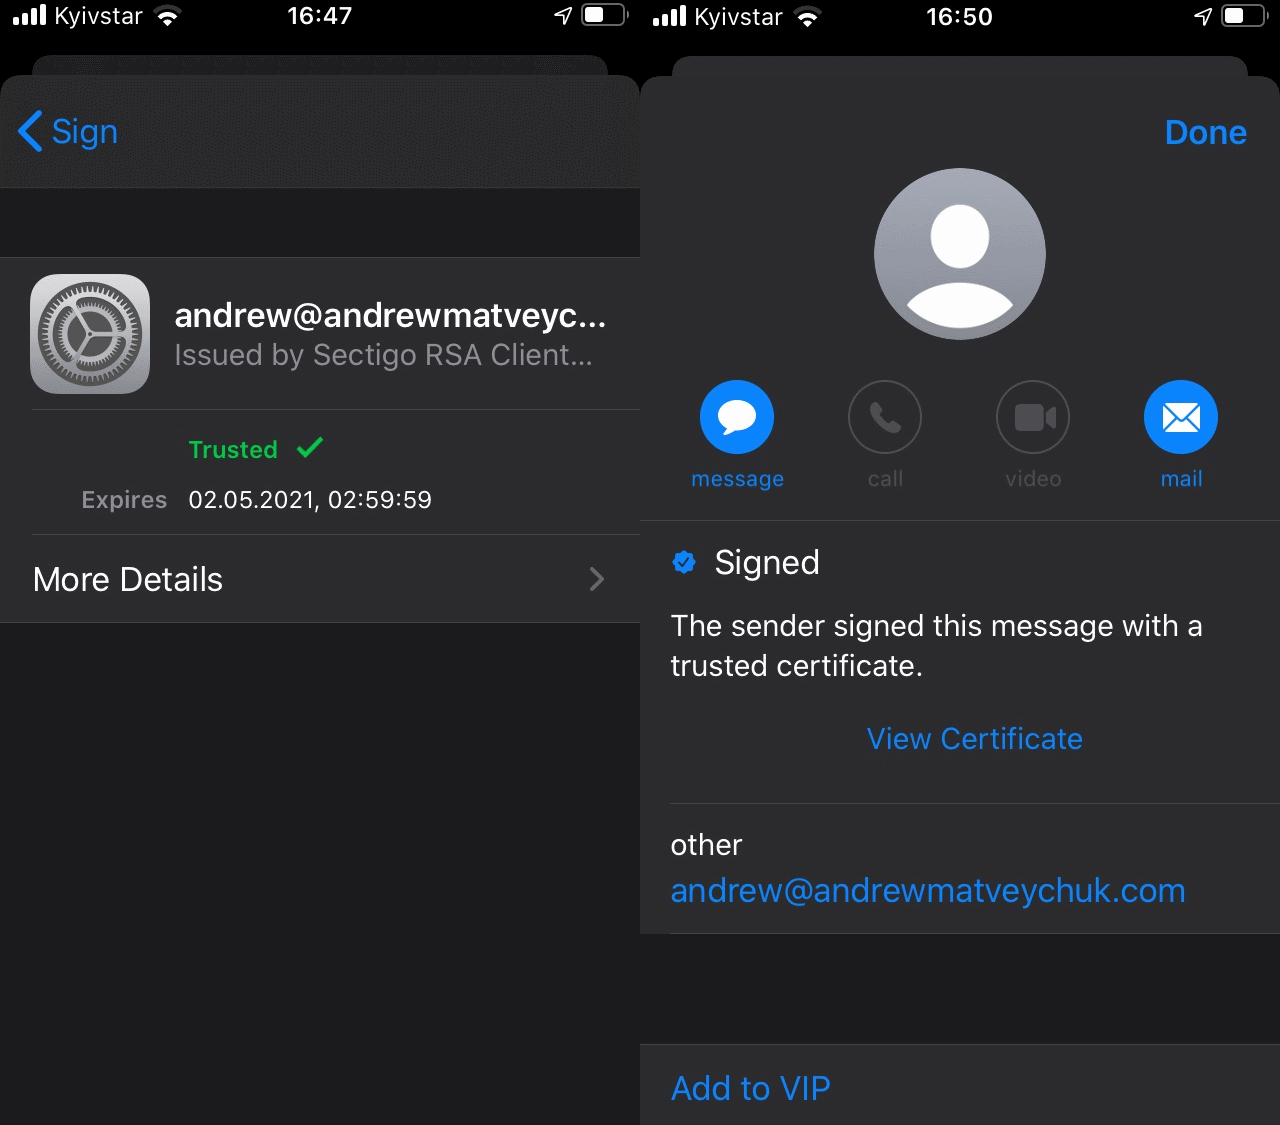
On the contrary, after importing my S/MIME certificate into iOS and was able to sign and read the signed emails in the native Mail app:
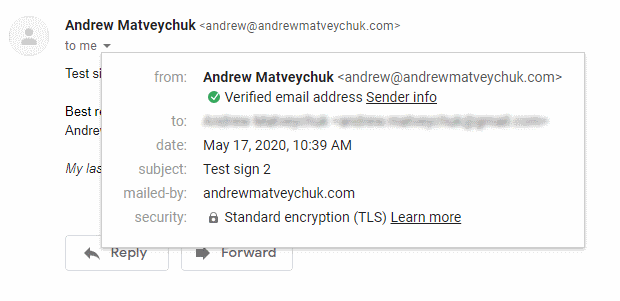
Here is how a signed email sent from my mobile looked like in a Gmail mailbox:
Unfortunately, there is no way to use a YubiKey with an iOS app, and the Mail app specifically, unless app developers implement YubiKey support in the app itself. So, the only way to use an S/MIME certificate on my mobile was to import its copy into iOS.
Conclusion
Even though the S/MIME standard was introduced in the late ’90s and declared to be widely supported as of today, it is still like a closed book all the time. S/MIME can be configured and work relatively well in a centrally managed corporate environment but is a bumpy road when you drive on your own. As in my example with a Microsoft account, S/MIME works fine in the Outlook desktop app but is not supported in the web and mobile versions of Outlook.
Even if you are a geek like me and can manage to configure the email signing on your side, there is absolutely no guarantee that your recipients will be able to read and verify your digital signature in their email clients.

Member discussion: