In the first part of this series, I wrote about running Ghost on Azure Web App for Containers. Here we will explore some security improvements to the original deployment configuration, as I promised last time.
Keeping your passwords secret with Azure Key Vault
It’s not a secret that you should store and handle passwords, API access keys, certificates, etc., in a secure way. The suggested approach of doing so in Azure is using Key Vault, which is a service specifically designed to store and retrieve sensitive information securely.
Despite Azure Key Vault being promoted in almost every design document produced by Microsoft, I still see many cases when developers just put credentials like database passwords in the application settings or have them in plain text in the connection strings. Besides, some time ago, the Azure product team introduced hidden values for the application settings by default so that nobody gets your password by shoulder surfing. To my mind, it made the security awareness even worse as that ‘Hidden value’ label usually deceives people and make them think that their passwords are secure:
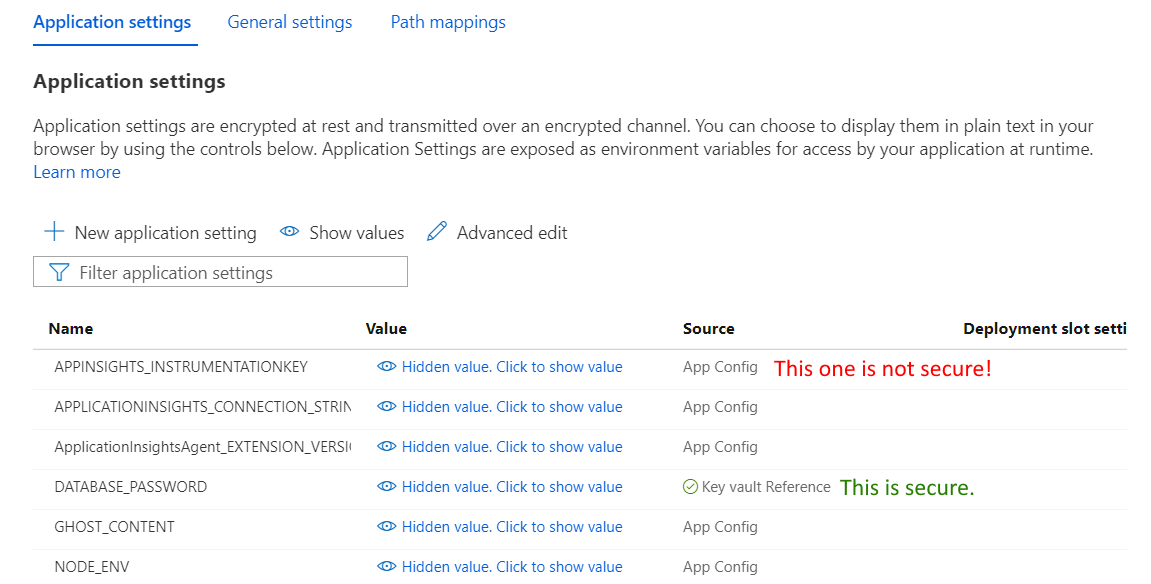
In reality, everything you store in the application settings and connections strings is not safe as it can be accessed (and read) by anybody having read permissions on that resource, which can be dozens of people in your organization and even beyond it.
I know all that might sound like pretty basic stuff for an experienced cloud engineer or architect, but it is still worth mentioning to increase people’s awareness.
For the sake of simplicity, in the initial version of my deployment configuration for Ghost on Azure Web App for Containers, I omitted the security aspect of the application and placed the database password provided during the deployment process into the application settings. Now, it is time to fix that ‘vulnerability.’
The Azure Key Vaults deployment is well documented, and there are plenty of sample ARM templates for it. Firstly, we will need a Key Vault resource in your configuration. Secondly, we should create a Key Vault secret to store the Ghost app database password to authenticate to the MySQL database. Thirdly, we must configure an access policy granting the app permissions to read (get) secrets from the key vault.
We will use a system-assigned managed identity created for our web app for configuring the access policy. Referencing the identity dynamically during resource provisioning is a bit tricky and requires some knowledge of the ‘reference’ function and Azure REST API.
Finally, we should reference our Key Vault secret containing the database password in the application settings of our web app:
If everything was configured correctly, you should see a green checkmark alongside the app setting, and the reference should be resolved upon the deployment:
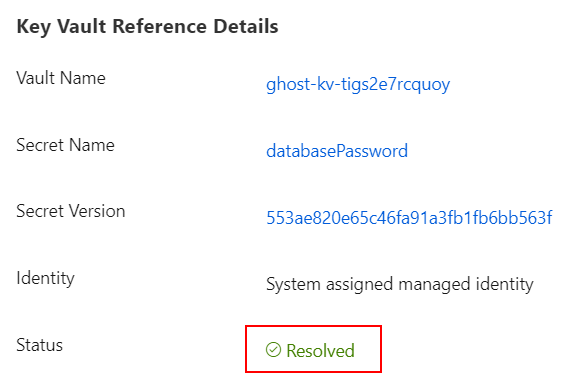
In production deployments, depending on your security requirements, it might make sense to provision and manage key vaults separately from your applications, e.g., putting them in other resource groups with no access to Key Vault resources for application developers. Basically, you can enable the developers and apps to use the secrets without exposing their values. If the secrets were compromised or need to be changed, you would need to update them in a Key Vault only (supposing you don’t reference a specific secret version).
Securing your app with Azure Front Door and Web Application Firewall (WAF)
The initial configuration leveraged Azure CDN to improve page load performance and offload traffic from the web app. Although Azure CDN does an excellent job and even can add some security-related features to your app, it is not a firewall that can protect your website from malicious attacks. So, what can we do with that?
Technically, we can put our web app behind an Azure Application Gateway, which is an OSI layer 7 load balancer with lots of security features, including traffic inspection and web firewall. Additionally, to ensure the app’s high availability, we might decide to deploy it into multiple regions and route user traffic to a suitable app instance with Azure Traffic Manager. Also, don’t forget about configuring Azure CDN for offloading static content. Sounds quite overwhelming for a simple web app, yeah?
In 2018, Microsoft announced Azure Front Door service as an all-in-one solution for acceleration, load balancing, and securing your web applications. So, basically, instead of designing and maintaining complex infrastructure consisting of many different Azure services, now you can achieve almost the same results by using Azure Front Door.
Please, note that Azure Front Door is neither evolution nor a replacement for other Azure-based traffic management and load balancing services. Its relative simplicity comes with a price of less control over the underlying network configuration. There are still cases where you would prefer building a ‘front door’ for your apps with more low-level solutions.
I am not going here into a detailed explanation of how the Azure Front Door service works or how to configure it. For those of you who already have worked with Azure Application Gateway, the concepts of frontends, backend pools, routing rules, and WAF should be pretty familiar. If you are new to this topic, I suggest checking out the “Managing Network Load Balancing in Microsoft Azure” course by Tim Warner.
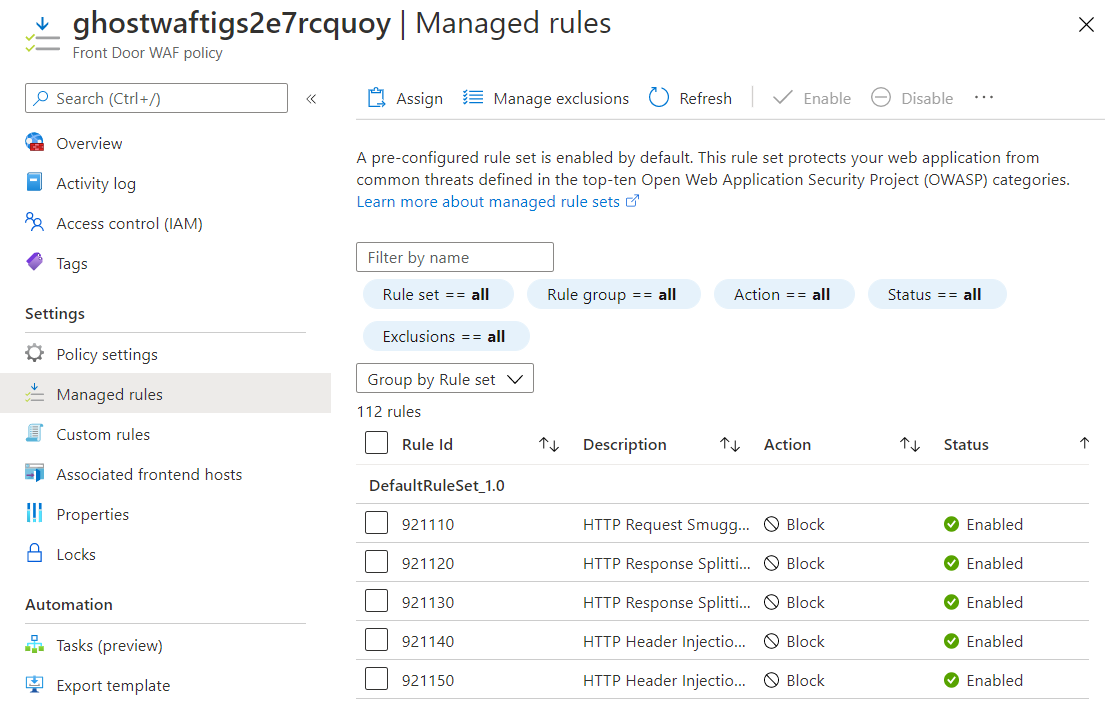
Speaking of our deployment configuration for Ghost on Azure Web App for Containers, I created its copy and replaced the Azure CDN resource with Azure Front Door one. In addition, I defined a Web Application Firewall policy and assigned it to the frontend of my Front Door instance. The policy contains only the default Azure-managed ruleset, which has lots of rules to protect your app from different attacks.
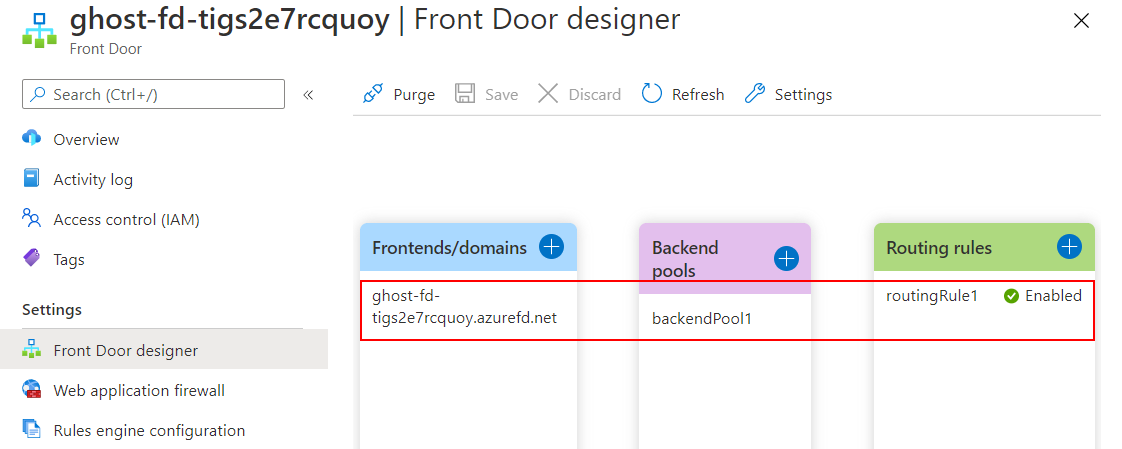
When deployed, the Front Door configuration on the Azure portal will be like the following:
The WAF policy should be linked to the Front Door frontend, and the default rule set should be enabled:
Give a few minutes after the initial app deployment for your web app to warm up and for Azure Front Door instance to start serving traffic before accessing your Ghost instance at https://<frontDoorHostName> (frontDoorHostName is specified in the outputs of the template deployment and is something like ‘ghost-fd-tigs2e7rcquoy.azurefd.net’).
So, now the web app is securely accessible via with Azure Front Door, but it still can be reached by its default name provisioned by App Service at https://uniqeappname.azurewebsites.net. Lucky, there is a simple solution for that. You can configure access only from Azure Front Door to your web app by creating an access restriction rule in App Service. In an ARM template, you would need just add the corresponding setting in the ‘siteConfig’ section:
A soon as the restriction rule is in place, you will receive the HTTP 403 status code when trying to reach the web app using its default name at azurewebsites.net subdomain.
Finally, all the incoming requests to the web app are coming only through Azure Front Door with proper traffic inspection and security protection.
Although using Azure Front Door for publishing your web apps can be beneficial, those benefits have their cost tags. In other words, running an application with Azure Front Door will cost you more than when running it with Azure CDN. For that reason, I decided to keep both deployment options in my GitHub repository.
If you have any questions about this topic, please post them in the comments section below 👇, and keep your web apps secure!
Member discussion: